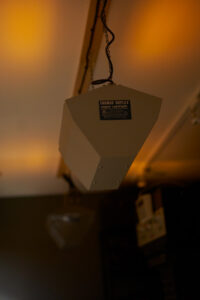
 One of the things I’ve always loved about working in the darkroom is the wonderful red or amber illumination that’s used when making black and white prints. The ceiling fixtures that emit this beautiful light are called safelights because they are safe for you to work under while using photographic paper which is sensitive to green and blue light but not red or, what’s more commonly used today, amber.
My first use of a safelight was about sixty-five years ago—the tiny red bulb that came with the little Ansco darkroom kit which I bought with the earnings from my paper route. My first experience was a bad one. I used the tiny 7 1/2 watt bulb with black and white film which, unlike photographic 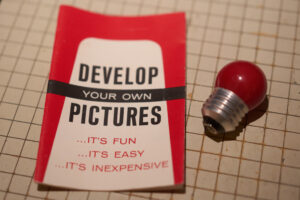 paper, is sensitive to all colors, red included. As a result, the film was completely ruined. It’s one of the few photographic mistakes I never made again. Even when used with photo paper, however, the brightness of the safelight and the length of time the paper is exposed to it are both critical factors. Even a safelight is not completely safe! Like so many things with film photography, the questions of safelight brightness and duration can only be determined by testing.
Over the past six decades as an inveterate darkroom worker, I’ve tested safelights many times and in many darkrooms. It’s crossed my mind this week that, at 74, I may have just done so for the last time. Actually, I hope so! Doing it  correctly is a rather tedious process. The old fashioned method is deceptively simple. You set out a sheet of photo paper in total darkness and on top of it you place a couple coins. Turn on your safelight for the time you expect to normally have the paper under its light and process the sheet of paper. If you can see the outline of the coins, your safelight is too bright, too close to the paper, or you’ve exceeded the time for which the light is “safe.”
Sounds easy but, as is usual in film photography, simple is usually not accurate. The thing is photo paper once exposed to light at all—such as the light from your enlarger that actually creates the image—becomes slightly more sensitive to any additional exposure—such as your safelight produces. As a result for a truly accurate test, you have to use paper that has been slightly pre-exposed to test your safelight—not the unexposed paper used in the coin test. There are many methods to accomplish this. Suffice it to say my method involves creating the little test prints you see hanging on the clothesline.
 What I learned technically is that to safely use Ilford Multigrade photographic paper in my darkroom, my three Thomas sodium vapor ceiling safelights need to have installed a Rosco R19 (deep red) filter to eliminate the spike in blue-green light the lamp emits, as well as 4 1/2 stops of neutral density (gray) filters to cut back on the lamp’s brightness. Under this illumination I can safely leave my photo paper face up for a full two minutes on the baseboard of either one of my three enlargers. The safelight’s graying down effect (called fogging) can’t be seen in the test prints until the paper has been subject to this level of safelight illumination for 180 seconds (three minutes,)
Doing this test allowed me to have slightly brighter illumination than I had been using in the darkroom—something that’s always welcome. But more importantly, it allowed me to be fully confident that my prints have all the sparkle and life of a well-made darkroom print and that the highlights of these prints (and near-highlights) are not grayed down by a safelight that’s too bright, too close, or used for too long a time.
In the precise world of digital photography, having to test safelights seems the quaint legacy of a bygone technology. Of course, serious digital photography requires testing too. The difference is most it can be done sitting in front of a computer monitor and entering things on a keyboard. The physicality of traditional film photography is something that’s missing from this exacting world of digital image making.
My little test prints traveled through a series of chemical baths that I prepared from scratch by weighing out powdered chemicals. I had to use time and temperature controls to expose and process each test print in exactly the same way. I had to wash them in running water to remove the residual chemicals. I had to slop the limp little sheets from tray to tray as I’ve done with prints for six decades now. But the practice of traditional photography—with its timers, thermometers, powdered chemicals, the gentle sound of running water, and yes, that soft amber illumination of the darkroom—never gets old for me! I love the physicality of it all, yes even if it turns out I actually have to test safelights again before old age confines me to doing my photography on a laptop.