You don’t find many photography studios in retail locations anymore, but in the early 1960s they were still fairly common. By the time I entered high school in 1962, I had worked for two such establishments, both in Virginia where I spent my summers. In a stroke of luck for which I would be forever grateful, the New Jersey high school I would eventually attend was still under construction and the old one was so crowded that split sessions had to be initiated. As a result, during my first two years of high school I didn’t begin classes until noon each day. Happily, this enabled me to have a job each weekday morning. Pursuing my passion for photography was more important to me than any of the subjects I studied in school, and I jumped at the chance to apply for a job at R.J. Mason Studio, a local business near our home.
Shown here at work, R.J. Mason was a maverick compared to the first two portrait photographers I’d worked for in Virginia. They were both proponents of the type of highly-retouched, idealized portraiture 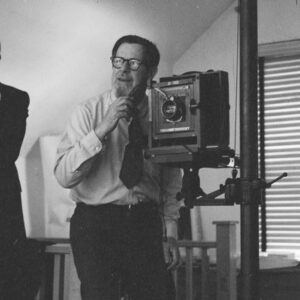 promoted by the Professional Photographers of America, of which they were both members. Mason hated the dated aesthetic of the PPofA and took a more contemporary approach to his work. He was also a true generalist, shooting products for advertising, model headshots, architecture, portraits, as well as a few very interesting sidelines.
I was delighted when Mr. Mason said he’d be willing to interview me about working there. After I showed some of my prints and stumbled through an encapsulation of my experience with the Virginia studios, he paused a while and then said to his wife Agnes, “Maybe he could do the baby pictures?” After a moment’s thought, she said, “That might work.” And so, at 14 years old, I had landed a dream job.
On a typical morning I would arrive around 8:30 and set up the studio’s darkroom. Mrs. Mason arrived a little after 9:00, having spent the first part of her morning socializing with other business owners at the local coffee shop. After mixing the processing solutions needed for the day, my responsibility was to work in the darkroom to complete all the orders for contact prints. These were wallet size portraits of high school seniors, along with small ID photos for passports and licenses. Contact prints are made by placing the photo paper in direct contact with the negative. Like others studios I’d worked for in the 1960s, the Masons used 4×5 inch sheet film for nearly everything.
Three mornings a week at around 10:30, the routine for which I’d been hired began. The Masons had an arrangement with the local hospital to photograph all the newborn babies. I would ride my bike over to the hospital each morning to take pictures of the newborns. I photographed the babies though the same large window used by all the adoring family members during visiting hours. I received from the nurses a slip of paper with the last name of each baby. As the bassinets were each rolled up to the window to be photographed, I carefully recorded the frame number next to each name. It was critical to do this correctly since it was the only way to insure each mother actually received a photo of her baby and not someone else’s! I messed up a lot of things during my time at the Masons but never this.
I processed the film as soon as I returned to the studio, since a volunteer from the hospital picked up the pictures that same afternoon. For those parents who chose to purchase them (nearly all) the cost was $4.00, of which the hospital ‘s Women’s Auxiliary received a share. Once I had hung the wet film in the film dryer, Mrs. Mason took over the printing operation and I was off to school.
I probably photographed over 500 babies during my first two years of high school. Those newborns have just turned sixty years old. Many are parents themselves, some are grandparents, and surely a certain number have passed on. I sometimes wonder how many still around have the photograph I made of them when they were less than 36 hours old.
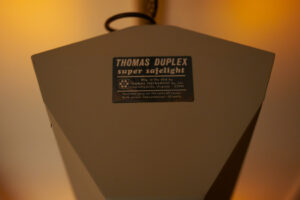
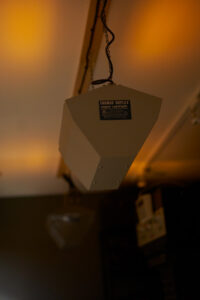 One of the things I’ve always loved about working in the darkroom is the wonderful red or amber illumination that’s used when making black and white prints. The ceiling fixtures that emit this beautiful light are called safelights because they are safe for you to work under while using photographic paper which is sensitive to green and blue light but not red or, what’s more commonly used today, amber.
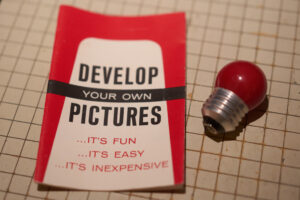 paper, is sensitive to all colors, red included. As a result, the film was completely ruined. It’s one of the few photographic mistakes I never made again. Even when used with photo paper, however, the brightness of the safelight and the length of time the paper is exposed to it are both critical factors. Even a safelight is not completely safe! Like so many things with film photography, the questions of safelight brightness and duration can only be determined by testing.
 correctly is a rather tedious process. The old fashioned method is deceptively simple. You set out a sheet of photo paper in total darkness and on top of it you place a couple coins. Turn on your safelight for the time you expect to normally have the paper under its light and process the sheet of paper. If you can see the outline of the coins, your safelight is too bright, too close to the paper, or you’ve exceeded the time for which the light is “safe.”
 What I learned technically is that to safely use Ilford Multigrade photographic paper in my darkroom, my three Thomas sodium vapor ceiling safelights need to have installed a Rosco R19 (deep red) filter to eliminate the spike in blue-green light the lamp emits, as well as 4 1/2 stops of neutral density (gray) filters to cut back on the lamp’s brightness. Under this illumination I can safely leave my photo paper face up for a full two minutes on the baseboard of either one of my three enlargers. The safelight’s graying down effect (called fogging) can’t be seen in the test prints until the paper has been subject to this level of safelight illumination for 180 seconds (three minutes,)
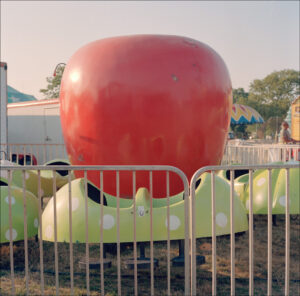 I was 24 years old when I first processed color negative film in Kodak’s new C-41 chemistry. I owned a small custom processing lab at the time. We had been running C-22 , C-41’a very time-consuming predecessor. I certainly welcomed the simplicity of process C-41, even though maintaining the new 100° processing temperature presented some challenges. It’s hard to believe that C-41 was introduced a half-century ago in 1972, ! When digital photography became practical in the 1990s, I switched over to it for my professional shooting but I continued using C-41 films for my creative work. Recently however, I’ve thought seriously about giving up C-41 because the cost of color film has risen so dramatically. The processing chemistry was also becoming difficult to find. I thought the six rolls of color negative film I had shot over the summer would be my last. But when I began scanning and printing the negatives, I became convinced I needed to stay with my my hybrid analog-to-digital workflow. I have a number of cameras that all use 120 roll film. I generally use either Kodak’s Ektar 100 or Portra 400 film which I process in a Jobo processor. I scanning the resulting negatives with a Hasselblad Flextight scanner. From these scans I make pigment prints using a large format Epson printer and Colorbyte RIP software. There’s a certain hard-to-definable look these prints have over those generated from a digital camera. Even though my digital camera’s dynamic range is better than ten stops, the colors from film seem softer somehow and the highlight gradation seems better. I’ve decided to stay with C-41 as long as I can afford to.